Discover 20 Baking Hacks Every Baker Should Know for perfect pastries. Elevate your baking with these professional tips and tricks designed to ensure impeccable results.
Introduction: Elevate Your Baking Game
Baking is both a science and an art, requiring precision, creativity, and a solid understanding of techniques. For bakers aiming to take their craft to the next level, mastering some essential hacks can make a significant difference. Each hack not only simplifies the process but also enhances the outcome, ensuring that every pastry is as perfect as possible.
Successful baking involves more than just following a recipe; it demands attention to detail and a strategic approach. These twenty baking hacks offer valuable insights that will help bakers refine their techniques, troubleshoot common issues, and bring a professional touch to their creations.
Key Areas to Focus On
- Ingredient Preparation and Selection:
- Use fresh, high-quality ingredients for the best results.
- Measure ingredients accurately using a digital scale.
- Sift flour to prevent clumps and ensure an even mixture.
- Temperature Control:
- Preheat the oven to the correct temperature before baking.
- Use an oven thermometer to ensure the actual oven temperature matches the setting.
- Bring ingredients like butter and eggs to room temperature before use.
- Mixing Techniques:
- Cream butter and sugar until light and fluffy to incorporate air.
- Mix dry and wet ingredients separately before combining.
- Avoid overmixing the batter to prevent tough pastries.
Essential Tools and Equipment
- Digital Scales: For precise measurement of ingredients.
- Oven Thermometers: To ensure consistent baking conditions.
- Stand Mixers: For efficient and thorough mixing of batters.
- Baking Mats: To provide non-stick surfaces and even heat distribution.
- Cooling Racks: To allow pastries to cool evenly and prevent sogginess.
Check out the Baking Essential tools.
Practical Tips for Perfect Pastries
- Use Parchment Paper: Line baking sheets and pans to prevent sticking.
- Chill Dough: Allow cookie dough to rest in the refrigerator for at least 30 minutes to enhance flavor and texture.
- Rotate Pans: Turn baking sheets halfway through the baking process to ensure even browning.
By integrating these hacks into their baking routine, bakers can achieve superior results with greater consistency. Understanding and applying these tips allows bakers to create pastries that not only taste delicious but also look visually appealing. Through practice and dedication, every baking endeavor can become a rewarding and enjoyable experience.
Prepping Your Kitchen: Essential Tools and Ingredients
Efficiently organizing your kitchen is critical to successful baking. Reliability, precision, and readiness begin with having the right tools and ingredients at your disposal.
Essential Tools
- Measuring Cups and Spoons: Accurate measurements are vital in baking. Ensure availability of both dry and liquid measuring cups and a set of measuring spoons.
- Digital Scale: Weighing ingredients can provide greater precision compared to volume measurements, aiding in consistent outcomes.
- Stand Mixer: A versatile tool for mixing, kneading, and whipping. Alternatively, a handheld mixer can suffice for simpler tasks.
- Mixing Bowls: Multiple sizes are useful for various stages of recipes. Opt for non-reactive materials such as stainless steel or glass type of Mixing Bowls.
- Baking Sheets and Pans: Invest in high-quality, non-stick baking sheets and pans of standard sizes such as 9×13, 8×8, and round cake pans.
- Parchment Paper and Silicone Baking Mats: These help prevent sticking and ease the cleanup process.
- Rolling Pin: Essential for rolling out doughs evenly. Marble or wooden pins are good choices.
- Wire Cooling Racks: Allows baked goods to cool evenly and prevents them from becoming soggy.
- Oven Thermometer: Many ovens can be off by several degrees. An oven thermometer ensures accurate baking temperatures.
- Pastry Brushes: Useful for applying glazes or egg washes uniformly.
Essential Ingredients
- Flour: All-purpose flour is a staple, but keep specialty flours like whole wheat or almond flour on hand for specific recipes.
- Sugars: Stock granulated sugar, brown sugar, and powdered sugar for versatility in recipes.
- Leavening Agents: Baking soda, baking powder, and yeast are fundamental to many baked goods.
- Fats: Unsalted butter, shortening, and oils such as vegetable or olive oil.
- Eggs: Fresh eggs contribute to structure and tenderness.
- Dairy: Whole milk, cream, buttermilk, and yogurt are often called for in recipes.
- Flavorings and Spices: Vanilla extract, almond extract, cinnamon, nutmeg, and cocoa powder provide depth of flavor.
- Salt: Essential for balancing sweetness and enhancing flavors.
- Chocolate: Baking chocolate, chocolate chips, and cocoa powder for a variety of treats.
- Add-ins: Nuts, dried fruits, and seeds can add texture and complexity.
“The secret to strong baking lies not just in technique, but in preparation. Equip the kitchen properly, and half the battle is already won.”
A well-prepped kitchen, furnished with the right tools and staple ingredients, paves the way for more efficient baking sessions and consistent, delightful results.
Hack 1: The Magic of Accurate Measurements
For any baker aiming to achieve consistency and perfection, mastering the art of accurate measurements is essential. Here, the focus is on the tools and techniques that ensure precision in every baking endeavor.
- Invest in a Digital Scale:
- A digital kitchen scale offers precision, reducing the margin for error common with volume measurements.
- Ingredients like flour can vary significantly in weight when measured by volume, leading to inconsistent results.
- Use Dry and Liquid Measuring Cups Appropriately:
- Dry measuring cups are designed for ingredients that need to be leveled off at the top.
- Liquid measuring cups, typically with spouts, ensure ease and accuracy in measuring liquids.
- Spoon and Level Method:
- For dry ingredients like flour and sugar, use a spoon to fill the measuring cup.
- Level off the surface with a flat edge, like the back of a knife, to avoid packing and inaccuracies.
- Weigh Main Ingredients:
- For critical ingredients such as flour, sugar, and butter, rely on weight measurements whenever possible.
- Most baking recipes provide weight measurements; if not, use conversion tools to switch from cups to grams or ounces.
- Check Calibration of Measuring Tools:
- Periodically ensure that scales and measuring cups are accurate.
- Calibration can drift over time, and even slight inaccuracies can impact baking outcomes.
- Understand Ingredient Densities:
- Know the weight of common baking ingredients, which can vary due to factors like humidity.
- For example, one cup of all-purpose flour typically weighs 120 grams, while one cup of granulated sugar weighs about 200 grams.
- Measuring Sticky Ingredients:
- For ingredients like honey or molasses, lightly grease measuring cups or spoons beforehand.
- This simple trick prevents sticky ingredients from clinging, ensuring accurate amounts.
- Sift Before Measuring:
- When a recipe calls for sifted flour, sift it before measuring to ensure aeration and prevent heavy, compacted measurements.
- Conversely, if a recipe requires unsifted flour, follow the spoon and level method.
- Practice Consistent Techniques:
- Develop a consistent method for measuring ingredients to produce uniformity in baked goods.
- Variations in technique can lead to significant differences in results, especially in recipes requiring exact proportions.
By embracing these practices, bakers can significantly reduce variability, enhancing the quality and consistency of their baked goods. Accurate measurements elevate basic recipes, translating precise ingredient handling into delectable, perfectly baked pastries.
Hack 2: Room Temperature Ingredients for Uniform Consistency
Achieving a uniform consistency in baked goods requires careful attention to detail, one notable aspect being the temperature of the ingredients. Using room temperature ingredients is paramount. Here’s why:
- Better Emulsification:
- Room temperature butter, eggs, and dairy products emulsify more effectively, producing a smoother batter. Cold ingredients can lead to a lumpy mixture, affecting the texture and rise of baked goods.
- Even Mixing:
- Ingredients at room temperature blend more evenly. Cold ingredients cause the batter to be inconsistent, leading to uneven baking and texture.
- Optimal Rise:
- Room temperature ingredients help create a fine crumb in cakes and muffins. Cold ingredients make the batter denser and reduce the rise, resulting in flat, heavy pastries.
Steps to Bring Ingredients to Room Temperature:
- Butter:
- Cut chilled butter into small cubes. This helps it reach room temperature faster, usually within 15-30 minutes. Alternatively, microwave it in short bursts, but avoid melting it.
- Eggs:
- Place refrigerated eggs in a bowl of warm (not hot) water for 10-15 minutes. This method quickly raises their temperature and is particularly useful for impromptu baking sessions.
- Dairy Products:
- Milk, cream, and yogurt can be measured out and left on the counter for about 30 minutes to an hour. For speedier results, microwave them for 10-second intervals, checking frequently to avoid overheating.
Key Pointers:
- Consistency is crucial for incorporating air, which is essential for achieving light, airy textures.
- Preventing curdling: Butter and sugar creamed together incorporate air better when at room temperature, leading to fluffier baked goods.
- Doughs and batters react more predictably with room temperature ingredients, leading to consistent results every time.
Understanding the science behind room temperature ingredients and applying these strategies will greatly enhance the quality of one’s baked products. Uniformity aids in both texture and rise, essential elements in the pursuit of perfect pastries.
Hack 3: The Right Way to Soften Butter
For any baker, correctly softened butter is essential to achieving the perfect texture and consistency in baked goods. Butter that is too cold may not cream properly, while overly softened or melted butter can lead to a disastrous outcome. Here are precise methods to soften butter effectively:
Methods to Soften Butter Properly
- Room Temperature Softening
- The most natural method involves simply leaving butter at room temperature.
- Place butter on a plate, ensuring it is in a safe spot, away from direct sunlight or heat sources.
- Allow it to sit for 30-60 minutes, depending on current room temperature.
- The ideal consistency is when the butter yields slightly to gentle pressure but retains shape.
- Cutting into Small Cubes
- For faster softening, cut butter into smaller cubes or slices.
- Spread the pieces on a plate in a single layer.
- This dramatically reduces the time needed compared to a whole stick.
- Monitor progress regularly, as smaller segments soften considerably quicker.
- Grating Butter
- Use a cheese grater to shred cold butter.
- Spread the grated butter evenly on a plate.
- This method significantly reduces the softening time since grated butter warms up faster.
- Keep checking until the desired softness is achieved.
- Microwave Technique
- For those in a rush, the microwave offers a quick solution.
- Place butter on a microwave-safe plate and cover it slightly with a microwave-safe dish.
- Set microwave to a low power setting (approximately 30% power).
- Heat in intervals of 5-10 seconds, checking frequently to ensure it doesn’t start melting.
- Repeat until the butter reaches the desired consistency.
Things to Avoid
- Direct Heat Exposure: Avoid softening butter using direct heat from stoves or ovens; this can lead to partial melting which alters its structure.
- Hot Water Methods: Techniques involving hot water are risky and can result in uneven softening or melting.
Checking Butter Softness
- Touch Test: Gently press the butter; it should indent easily yet hold its shape.
- Visual Inspection: It should appear glossy but not shiny with visible curvature on edges holding structure.
Mastering the right way to soften butter ensures superior results in recipes demanding precise butter consistency, such as cookies or pastries. Following these methods helps maintain the butter’s integrity and ensures a uniformly mixed dough or batter.
Hack 4: The Importance of Sifting Dry Ingredients
Sifting dry ingredients is a critical step in baking that can substantially influence the texture and consistency of the final product. It achieves several essential functions and should not be overlooked by any serious baker.
Aeration
Sifting introduces air into the dry ingredients, making them lighter and easier to mix. This is particularly important for flour, which can become compacted during storage. Aerated flour contributes to a lighter, more tender texture in baked goods such as cakes and pastries.
Elimination of Lumps
Dry ingredients, especially powdered ones like baking soda or cocoa, can form lumps. Sifting helps break apart these lumps, ensuring an even distribution throughout the batter. This prevents unpleasant pockets of undissolved ingredients and promotes a smoother consistency.
Even Mixing of Ingredients
When multiple dry ingredients are involved, sifting ensures they are thoroughly combined. This uniform distribution is crucial in achieving consistent results. For example, evenly distributed baking powder or baking soda ensures the even rising of cakes and muffins.
Removal of Impurities
Sifting can also help remove any unwanted particles or debris that may have found their way into the ingredients during processing or storage. This is particularly important for ingredients like flour and powdered sugar.
Saving Time and Effort
While it may seem like an extra step, sifting can actually save time and effort in the long run. It makes combining ingredients more efficient and reduces the need for additional mixing.
Equipment
Using the right equipment for sifting is important. A fine-mesh sieve is ideal for most dry ingredients. For larger quantities, a hand-crank sifter may be more efficient. Always ensure the sifting tool is clean and dry to prevent clumping.
Best Practices
- Measure Before Sifting: For accuracy, always measure your ingredients before sifting.
- Gradual Addition: When incorporating sifted dry ingredients into wet mixtures, add them gradually to avoid clumping.
- Storage: Store sifted ingredients separately if pre-sifting is necessary. Use airtight containers to maintain their aerated state.
- Visual Inspection: Always visually inspect ingredients after sifting to ensure no clumps or debris remain.
By adhering to these best practices, bakers can achieve superior texture and uniformity in their baked goods. This crucial step should be a non-negotiable in the quest for perfect pastries.
Hack 5: Using Parchment Paper for Seamless Baking
Parchment paper serves as a versatile tool for bakers, facilitating an easier, cleaner, and more efficient baking process. By integrating parchment paper into their baking routine, individuals can enhance their kitchen practices in several ways:
- Non-Stick Surface: By lining baking sheets and pans with parchment paper, bakers ensure that their creations—whether cookies, cakes, or bread—do not stick. This minimizes the risk of breakage and simplifies the transfer of baked goods from the pan to a cooling rack.
- Even Heat Distribution: Parchment paper aids in spreading heat uniformly across the surface of the baked goods. This balanced heat distribution results in evenly baked items, reducing the risk of burnt edges and undercooked centers.
- Easy Cleanup: The parchment paper can be disposably removed and tossed away, making post-baking cleanup a breeze. This eliminates the cumbersome scrubbing of stubborn residues from baking sheets and pans.
- Reusability: High-quality parchment paper can often be used more than once, depending on the cooking time and temperature. However, it is essential to evaluate the paper’s condition after each use to ensure its effectiveness remains intact.
- Consistent Results with Rolling Dough: When rolling out dough for pastries or cookies, positioning a piece of parchment beneath and another on top helps maintain a consistent thickness. This prevents dough from sticking to the rolling pin and eliminates the need for extra flour, which could dry out the dough.
- Piping Templates: For precision in baking, bakers can draw shapes or lines on parchment paper to guide piping or spacing cookies. The marked side should face down to avoid direct contact with the food.
- Portion Control: Cutting parchment paper into pre-measured sheets in advance aids in quick and efficient baking preparation. Bakers can then swiftly line their pans without fussing with tearing or resizing paper in the midst of the baking process.
- Versatility for Various Recipes: Parchment paper isn’t limited to a single type of baking. From delicate meringues to roasted vegetables, its utility spans a comprehensive range of culinary applications.
- Safer Handling of Hot Items: With parchment paper, bakers can safely handle and lift hot items from the oven without direct contact, reducing the risk of burns.
Incorporating parchment paper into their culinary toolbox allows bakers—both amateur and professional—to achieve higher efficiency and superior outcomes in their baking endeavors.
Hack 6: The Secret to Perfect Pie Crusts
The journey to achieving a flawless pie crust begins with understanding the fundamental aspects of the dough. Every baker must pay attention to the following elements:
Ingredients
- Flour: Utilizing a combination of all-purpose and pastry flour can offer the desired balance of structure and tenderness.
- Fat: Butter provides exceptional flavor, while shortening produces a flakier texture. A mix of both can yield the best results.
- Liquid: Cold water is essential. Adding a tablespoon of vinegar or vodka can prevent the formation of gluten, enhancing flakiness.
Temperature
- Keep Everything Cold: Chilling the flour, fat, and liquid minimizes the risk of the fat melting into the flour. Using a chilled bowl will help maintain a lower temperature.
- Chill the Dough: After mixing, refrigerating the dough for at least 30 minutes allows the gluten to relax and prevents shrinkage during baking.
Technique
- Cutting in the Fat: Use a pastry cutter or fingertips to cut the fat into the flour. Aim for pea-sized chunks to ensure a flaky texture.
- Minimal Mixing: Overworking the dough can toughen it. Mix until the dough just comes together.
- Rolling the Dough: Roll from the center outward, rotating the dough frequently. This helps maintain an even thickness and prevents sticking.
Additional Tips
- Resting the Dough: Allow the dough to rest in the fridge after rolling and before baking. This further relaxes gluten and sets the shape.
- Blind Baking: For custard or cream pies, pre-baking the crust with weights ensures it remains crisp and doesn’t puff up.
Finishing Touches
- Egg Wash: A mix of beaten egg and water brushed on before baking can enhance color and shine.
- Sugar Sprinkle: Adding granulated or coarse sugar to the crust before baking can provide an extra crunch and sweetness.
Problem-Solving
- If the crust turns out too tough, the dough may have been overworked.
- Soggy bottoms can often be avoided by preheating the baking sheet before placing the pie.
Mastering these techniques ensures a perfect pie crust, making each slice a delightful experience.
Hack 7: How to Avoid Overmixing Batter
Overmixing batter can lead to dense and tough baked goods, instead of the light and fluffy texture that bakers aim for. To prevent overmixing, it’s essential to understand the science of baking and follow several key guidelines.
- Understand Gluten Development:
- Gluten, a protein in flour, develops when flour is mixed with moisture. Excessive mixing strengthens gluten, resulting in a denser texture. To minimize gluten development, mix only until the ingredients are just combined.
- Use a Gentle Mixing Technique:
- When combining wet and dry ingredients, fold rather than stir vigorously. Folding incorporates ingredients without aggressive mixing, helping to maintain a light texture. This technique is particularly important in batters for cakes, muffins, and quick breads.
- Monitor Consistency:
- Observe the batter’s consistency carefully. It should be smooth and uniform, but not overly glossy or stretchy, which indicates overdevelopment of gluten. Stop mixing as soon as dry streaks disappear.
- Time Your Mixing:
- Set a timer or count strokes while mixing. Typically, ten to fifteen strokes or forty-five to sixty seconds with an electric mixer on low speed is sufficient for most batters. Over-mixing can occur within seconds, so vigilance is key.
- Incorporate Ingredients in Stages:
- Adding dry ingredients in stages allows for gradual incorporation, reducing the risk of overmixing. Begin with a small amount of dry ingredients, gently folding them into the wet mixture before adding more. This approach provides better control over the final consistency.
- Use Appropriate Tools:
- Utilize a wide spatula or wooden spoon for manual mixing. For electric mixers, a paddle attachment on the lowest setting minimizes the risk of overmixing compared to higher speed settings or whisk attachments.
- Practice Patience:
- Resist the urge to continue mixing “just a bit more.” Trust the process and your instincts. Often, under-mixing is less detrimental than overmixing, as minor lumps usually dissolve during baking.
- Educate on Specific Recipes:
- Some recipes, especially those for delicate cakes like chiffon or angel food cakes, provide explicit instructions on mixing times and speeds. Strict adherence to these instructions is critical for achieving the desired results.
By employing these techniques, bakers can avoid common pitfalls associated with overmixing and consistently produce tender, delightful baked goods.
Hack 8: Understanding Oven Temperatures and Adjustments
Understanding oven temperatures and making appropriate adjustments is crucial for achieving perfect pastries. Here are several key aspects to consider:
Importance of Accurate Temperature
- Consistency: Maintaining an accurate oven temperature is vital for consistent results. Minor deviations can cause significant differences in texture, color, and flavor.
- Recipe Adherence: Most recipes are tested within specific temperature ranges. Deviations from the suggested range could lead to undercooked centers or overly browned exteriors.
How to Calibrate Your Oven
- Read the Manual: Start by consulting the oven’s manual for instructions on calibration.
- Use an Oven Thermometer: Place an oven thermometer inside to compare the set temperature with the actual temperature.
- Adjust as Needed: Some ovens have built-in calibration features that allow you to adjust the temperature settings.
Common Temperature Adjustments
- High Altitude Baking: At higher altitudes, adjust the temperature by increasing it by 15-25 °F (5-10 °C) to counteract lower air pressure.
- Convection vs. Conventional Ovens: When using a convection oven, reduce the suggested temperature by 25 °F (4 °C) due to the more efficient heat circulation.
Factors Affecting Oven Temperature
- Oven Door: Frequently opening the oven door can cause temperature fluctuations. Try to minimize this to maintain a consistent temperature.
- Oven Racks: Placement of the rack can influence baking times and outcomes. Center rack placement is usually ideal unless specified otherwise in the recipe.
Utilizing Oven Thermometers
“A reliable oven thermometer helps ensure that the oven’s internal temperature matches its settings. This is particularly invaluable for baking delicate pastries.”
Preheating and Bake Times
- Proper Preheating: Always preheat the oven for at least 15-20 minutes to reach the desired temperature before placing the pastries inside.
- Monitoring Bake Times: Check your pastries a few minutes before the end of the suggested bake time to account for any oven temperature variances.
Troubleshooting Common Issues
- Underbaked Centers: If pastries are underbaked in the center, increase the temperature by 10-15 °F (5-8 °C) and extend the baking time slightly.
- Overbrowned Tops: Lower the temperature by 10-15 °F (5-8 °C) and cover pastries loosely with foil to prevent further browning while the insides continue to cook.
Understanding and controlling oven temperatures can significantly improve baking results, enhancing the overall quality and consistency of pastries. Consistent monitoring and adjustments are key to mastering this essential baking process.
Hack 9: The Role of Resting Time in Doughs and Batters
In baking, understanding the role of resting time can greatly impact the texture and flavor of the final product. Resting time allows for crucial chemical and physical changes within doughs and batters, contributing to superior baked goods.
Gluten Relaxation
When dough is kneaded, gluten strands develop, creating elasticity and strength. However, excessive elasticity can make the dough difficult to roll out or shape. Resting the dough allows these gluten strands to relax, making it more manageable and preventing shrinkage during baking.
Enhanced Flavor
Resting time helps in the development of flavors, especially in yeasted doughs. During this period, enzymes break down complex carbohydrates into simpler sugars, adding depth to the flavor profile. This is particularly evident in bread and pizza doughs, where extended resting periods can result in a richer taste.
Hydration
For batters, resting time allows for proper hydration of flour. When flour is mixed with liquids, it takes time for the flour to fully absorb the moisture. Proper hydration is essential for consistent texture and improved crumb structure in the finished product.
Reduced Stickiness
Resting time can significantly reduce the stickiness of dough. The flour continues to absorb moisture during this period, making the dough less tacky and easier to handle. This is particularly beneficial when rolling out pie crusts or handling sticky cookie dough.
Examples of Resting Times
Several types of baked goods benefit from resting:
- Bread Dough: Typically requires multiple resting periods, including an initial bulk fermentation and a final proofing phase.
- Pastry Dough: Shortcrust and puff pastry benefit from resting in the refrigerator to maintain flakiness.
- Batter: Pancake and waffle batter need time to rest to ensure even distribution of ingredients and better texture.
Practical Tips
- Cover the Dough: Always cover resting dough with a damp cloth or plastic wrap to prevent it from drying out.
- Room Temperature: Allow doughs to rest at room temperature unless specified otherwise.
- Refrigeration: For extended resting periods, refrigerate the dough to control yeast activity and prevent over-fermentation.
In summary, resting times are not just a suggestion but a pivotal step in achieving perfect baked goods. Understanding and implementing appropriate resting periods can lead to improved texture, enhanced flavor, and easier handling of doughs and batters.
Hack 10: Properly Whipping Egg Whites
Whipping egg whites requires precision and attention to detail. Successfully achieving stiff or soft peaks can make or break a recipe, particularly in meringues, soufflés, and certain cakes. Follow these guidelines to master the technique:
- Temperature Matters
Start with egg whites at room temperature. Cold egg whites take longer to whip and may not reach full volume. To quickly bring eggs to room temperature, place them in a bowl of warm water for 5 to 10 minutes. - Clean Equipment
Ensure that all bowls, whisks, or beaters are impeccably clean and free of grease. Even a small amount of fat or residue can prevent egg whites from whipping correctly. Use a stainless steel or glass bowl, as plastic can harbor traces of oil. - Egg White Separation
When separating eggs, take extreme care to avoid any yolk contaminating the whites. Even a trace of yolk can hinder the whipping process. Use an egg separator or separate the eggs while they are still cold for better control. - Gradual Speed Increase
Begin beating egg whites on a low speed to create small, stable bubbles. Gradually increase the speed to medium and then high as the whites begin to foam and thicken. This method ensures a more stable structure. - Acid Addition
Adding an acid such as cream of tartar or a few drops of lemon juice can help stabilize the egg whites. For every egg white, use 1/8 teaspoon of cream of tartar or 1/2 teaspoon of lemon juice. - Sugar Timing
If incorporating sugar into the egg whites, add it slowly once soft peaks have formed. Adding sugar too early can create a stable, smooth meringue but may hinder volume increase. Add a tablespoon at a time, beating well after each addition. - Visual Cues
Watch for visual clues to determine the desired peak stage:- Soft Peaks: Whites will form gentle, drooping peaks when the beaters are lifted.
- Stiff Peaks: Whites will stand straight up without collapsing when the beaters are lifted.
Paying attention to these details ensures a perfect whipped egg white every time, essential for various delicate and airy baked goods.
Hack 11: Mastering the Art of Folding Ingredients
Mastering the art of folding ingredients is an essential skill every baker should possess to achieve light, airy baked goods. This process involves gently incorporating ingredients to maintain the desired texture and volume, essential for delicate items like sponge cakes, soufflés, and meringues.
Understanding the Technique
- Use the Right Tools: Invest in a large metal spoon or a rubber spatula. These tools are ideal for gently lifting mixtures without deflating them.
- Bowl Selection: Choose a wide, shallow mixing bowl to give you enough space for gentle mixing movements.
- Preparing Ingredients: Ensure ingredients are at room temperature. Cold ingredients can cause mixtures to deflate more easily.
- Pre-Mixing: Lightly beat the egg whites or whipped cream before integrating them into other mixtures. This will help them maintain their structure.
Step-by-Step Folding Process
- Add a Small Portion First: Start by adding a small portion of the whipped ingredients to the mixture. This helps lighten the base mixture.
- Cutting and Lifting Motion: Using the spatula or spoon, cut through the center of the mixture, then scrape along the bottom of the bowl, lifting the mixture and flipping it over gently.
- Rotate the Bowl: Continuously rotate the bowl with each folding action to ensure even distribution.
- Repetition: Apply this technique repeatedly until the ingredients are just combined. Over-folding can deflate the mixture, affecting the final product’s texture.
Common Pitfalls to Avoid
- Improper Equipment: Avoid wooden spoons or electric mixers for this task; they can overly agitate the mixture.
- Over-Mixing: Mixing too aggressively or for too long can cause the mixture to collapse.
- Quick Movements: Slow, deliberate folds are the key to maintaining volume.
Practice Makes Perfect
Bakers should practice this technique with various recipes to become proficient. Trying different mixtures and observing how they react can improve one’s skill in folding.
This essential skill elevates the quality of delicate baked goods, contributing to a professional finish. Mastering this technique demonstrates a baker’s attention to detail and dedication to the craft of baking.
Hack 12: The Best Technique for Layering Cakes
To achieve a flawlessly layered cake, one must adhere to a methodical approach. This technique ensures that each layer is evenly proportioned, structurally sound, and visually appealing. Follow these detailed steps to master the art of layering cakes:
Tools Needed:
- Cake leveler or serrated knife
- Cake turntable
- Offset spatula
- Piping bag (optional)
- Ruler or measuring tape
Step-by-Step Process:
- Bake and Cool the Cakes:
- Begin by baking the cake layers according to the recipe instructions. Ensure the layers are completely cooled before proceeding.
- To expedite cooling, place the cakes on a wire rack. Allowing air to circulate around the cake promotes even cooling.
- Level the Cakes:
- Utilize a cake leveler or a serrated knife to trim the domed tops off the cakes. Eye-level precision is crucial here for even layers.
- Optionally, flip the cakes upside-down before leveling, as flatter bottoms provide a sturdier stacking surface.
- Prepare the Filling:
- Whether using buttercream, ganache, fruit preserves, or any other filling, ensure it is at the right consistency—spreadable but not runny.
- For intricate designs, consider using a piping bag to evenly distribute the filling.
- Position the First Layer:
- Place the first cake layer on a cake board or directly onto the cake turntable. Secure it with a small amount of frosting to prevent sliding.
- Apply the Filling:
- Spread the chosen filling generously over the first layer, using an offset spatula for smooth distribution. Maintain an even thickness to avoid uneven layers.
- Pro tip: Create a frosting dam around the edge using a piping bag to prevent the filling from oozing out.
- Stack Subsequent Layers:
- Place the next cake layer on top of the filling, ensuring alignment. Repeat the filling and stacking process for each layer.
- For added stability, gently press down on each layer as it is added.
- Crumb Coat:
- Apply a thin layer of frosting over the entire cake to lock in crumbs. This initial coat ensures that the final layer of frosting remains crumb-free.
- Chill the cake for about 15–30 minutes to set the crumb coat.
- Final Frosting:
- After the crumb coat has set, apply the final layer of frosting. Use the turntable to assist with even coverage, smoothing with an offset spatula.
Adhering to this technique enables bakers to create beautifully layered cakes that are both stunning and delicious.
Hack 13: How to Achieve a Fluffy Texture
Achieving a fluffy texture in baked goods involves a careful selection of ingredients and techniques that contribute to the desired consistency. Following these guidelines can ensure light and airy results:
- Choose the Right Flour:
- Opt for all-purpose or cake flour for most recipes. Cake flour has a lower protein content, producing a softer texture.
- Avoid bread flour, which has high protein content and yields a denser result.
- Proper Creaming of Butter and Sugar:
- Use room temperature butter to ensure it creams well with sugar.
- Beat the mixture for several minutes until it becomes pale and fluffy. This incorporates air into the batter, which is crucial for achieving a light texture.
- Correct Use of Leavening Agents:
- Measure baking powder and baking soda accurately.
- Ensure they are fresh; expired leavening agents can result in dense baked goods.
- Incorporate Eggs at Room Temperature:
- Room temperature eggs blend more easily into the batter, trapping air and ensuring uniform texture.
- Beat eggs well before adding them to the mixture to increase their volume and enhance fluffiness.
- Folding Ingredients Properly:
- Fold dry ingredients into wet ingredients gently using a spatula to avoid deflating the batter.
- Overmixing can lead to a dense texture due to the glutens forming tough strands.
- Using Buttermilk or Yogurt:
- Swap regular milk with buttermilk or yogurt. Their acidity reacts with baking soda, creating extra lift in the batter.
- These ingredients add moisture without making the batter too heavy.
- Sufficient Baking Time and Temperature:
- Follow the recipe’s suggested baking times and temperatures precisely. Underbaking can cause a densely packed interior.
- Avoid opening the oven door frequently, which can cause fluctuations in heat, affecting the rise and fluffiness.
- Cooling Techniques:
- Allow baked goods to cool on a wire rack. This prevents the bottom from getting soggy and helps maintain a good texture.
- Do not leave baked goods in the pan, as residual heat can continue cooking and make the texture tough.
- Use of Sifting:
- Sift dry ingredients like flour, baking powder, and cocoa powder. This removes lumps and incorporates air, resulting in a lighter mixture.
- Re-sift ingredients if necessary for ultra-fine and smooth batter.
A dedicated approach to each aspect of the baking process will significantly enhance the fluffiness of pastries, ensuring they are light, airy, and delightful.
Hack 14: The Benefits of Chilling Cookie Dough
Chilling cookie dough before baking is more than just a suggestion; it is a critical step that provides numerous advantages. This essential process is often overlooked despite its significant impact on the final product. Here are several reasons why chilling cookie dough is beneficial:
Improved Flavor
- Enhanced Taste: When cookie dough is allowed to rest in the refrigerator, the flavors meld together and deepen. The chill time allows the flour to fully hydrate, which leads to a richer flavor profile once baked.
- Better Ingredient Integration: Chilling time lets ingredients such as vanilla or salt more deeply penetrate the dough, offering a more balanced and consistent taste.
Texture Enhancement
- Less Spread: Chilled dough spreads less in the oven, resulting in thicker, more evenly baked cookies. This is particularly important for achieving a chewy texture.
- Reduced Greasiness: Allowing the fat in the dough to firm up means less oil spreading out during baking, contributing to a better texture.
Easier Handling
- Less Stickiness: Cold dough is less sticky, making it easier to handle and shape. This is especially useful for roll-out cookies and intricate shapes.
- More Control: Chilled dough allows for more precise cookie portioning, ensuring uniformity in size and thickness, which is crucial for even baking.
Simplified Baking Process
- Advance Preparation: Chilling dough can often be done ahead of time. This convenient option allows for baking to fit into a busy schedule without compromising quality.
- Batch Baking: Pre-chilled dough can be batch-frozen and then baked as needed. This makes it easier to enjoy fresh cookies anytime without starting from scratch.
Scientific Advantage
- Controlled Moisture Levels: Chilling the dough reduces moisture loss, preventing cookies from becoming dry or too cakey. This step controls the dough’s moisture, affecting the texture.
- Gluten Development: Allowing the dough to rest reduces overdevelopment of gluten, ensuring that cookies remain tender and not too tough.
Incorporating time for chilling cookie dough is a straightforward process with significant rewards. Embracing this simple yet effective hack can elevate the quality of cookies, making them tastier and easier to manage while also saving time in the baking process.
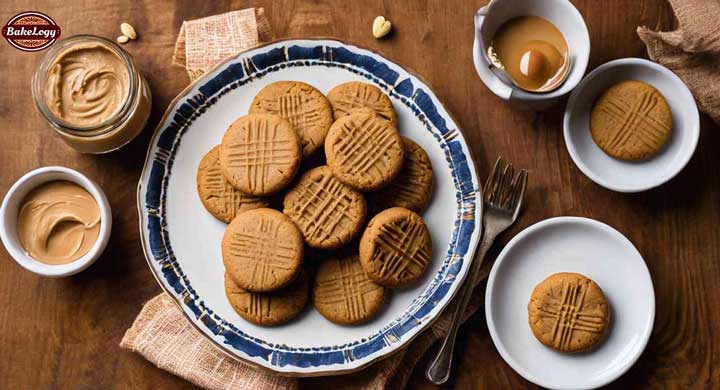
Check out the best recipe for Peanut Butter Cookies.
Hack 15: Trouble-free Techniques for Lining Baking Pans
Lining baking pans is crucial for preventing sticking and ensuring easy removal of baked goods. Employ these techniques for a hassle-free experience:
- Parchment Paper
- Measure and Cut: Lay the parchment paper over the pan and cut according to the shape, ensuring it fits snugly.
- Grease the Pan: Lightly grease the pan before placing the cut parchment. This helps the paper adhere properly.
- Corners Assistance: For square or rectangular pans, create small cuts on each corner to allow the paper to fold and fit perfectly.
- Non-Stick Spray
- Choose High-Quality Sprays: Opt for non-stick sprays with flour, designed for baking.
- Even Coverage: Hold the spray can about 5 to 6 inches away from the pan and spray in a sweeping motion to ensure even coverage.
- Edge Care: Make sure to spray the sides and edges thoroughly, as it helps in releasing the baked product easily.
- Foil for Easy Cleanup
- Heavy-Duty Foil: Use heavy-duty aluminum foil for lining, especially for dense and sticky baked goods.
- Mold to Fit: Press the foil into the shape of the pan, smoothing it out to avoid folds and creases.
- Double Liner: For extra protection, consider using foil over parchment paper.
- Reusable Baking Liners
- Silicone Mats: Use silicone baking mats for consistent non-stick performance. They work particularly well for cookies and pastries.
- Tailoring Mats: Some silicone mats are customizable. Tailor them to fit the size of your baking pans with kitchen scissors.
- Butter and Flour Dusting
- Butter the Pan: Generously apply butter using a brush or paper towel.
- Flour Application: Dust the buttered pan with flour, then tap out the excess by lightly shaking the pan.
- Ensure Even Coating: Ensure even distribution, particularly in the corners, to prevent sticking.
Applying these techniques will provide a trouble-free lining process, leading to better, more successful baking outcomes.
Hack 16: Using a Water Bath for Cheesecakes
Baking a perfect cheesecake can feel like a daunting task, but using a water bath is a foolproof method to achieve a creamy, crack-free cheesecake every time. Here’s a comprehensive guide on how to effectively use a water bath:
Step-by-Step Instructions
- Prepare the Cheesecake Pan:
- Wrap the bottom and sides of the springform pan with two to three layers of heavy-duty aluminum foil. This prevents water from seeping into the cheesecake.
- Alternatively, place the springform pan in a slightly larger silicone pan to keep water out.
- Preheat the Oven:
- Set your oven to the desired temperature as per the cheesecake recipe.
- Position your oven rack in the middle to ensure even heat distribution.
- Boil Water:
- Bring a pot of water to a boil. You will pour this water into your roasting pan.
- Prepare the Roasting Pan:
- Place the prepared cheesecake in a large roasting pan. The pan should be large enough to hold the cheesecake pan with space for water around it.
- Put the roasting pan with the cheesecake in the oven.
- Pour the Water:
- Carefully pour the boiling water into the roasting pan until it comes about halfway up the sides of the cheesecake pan.
- Ensure that no water splashes onto the cheesecake batter.
Tips to Remember
- Check Water Level:
- Periodically check the water level during baking. Add more boiling water if needed to maintain the level.
- Don’t attempt to top up with cold water as it can affect the baking temperature.
- Use a Thermometer:
- Verify the cheesecake’s doneness by gently shaking the pan or using a kitchen thermometer to check the center’s temperature. A perfect cheesecake will have a slightly wobbly center and an internal temperature of around 150°F.
- Avoid Overbaking:
- Remember, a cheesecake will continue to cook with residual heat, so avoid overbaking. It’s key to let the cheesecake set while cooling.
Using a water bath mimics the environment of a bain-marie which gently cooks the cheesecake, ensuring it comes out silky smooth with a luscious, rich texture.
Hack 17: Checking for Doneness without Guesswork
One of the most challenging aspects of baking is determining when baked goods are done. Relying solely on visual cues often leads to over- or under-baked results. There are methods to ensure precision.
Use a Thermometer
- Internal Temperature: The most accurate way to check doneness is by measuring the internal temperature with an instant-read thermometer. For cakes and muffins, target 200°F to 210°F. For bread, a range of 190°F to 205°F is ideal.
- Recalibration: Ensure your thermometer is accurate. Recalibrate regularly by testing in ice water (32°F) and boiling water (212°F).
The Toothpick or Skewer Test
- Method: Insert a toothpick or skewer into the center of the baked good.
- Results: If it comes out clean or with a few crumbs, it’s done. If it’s wet or sticky, it needs more time.
Finger Test for Bread
- Press: Gently press the surface of the bread.
- Spring Back: If it springs back, it’s likely done. If it leaves an indentation, it needs more time in the oven.
Visual Cues for Specific Baked Goods
- Cakes: Look for edges pulling away from the pan and a slight bounce when pressed.
- Cookies: Should be golden brown around the edges but still soft in the center.
- Pies: Crust should be golden brown and filling should be bubbling.
Jiggle Test for Custards and Cheesecakes
- Method: Gently shake the pan.
- Movement: Custard or cheesecake should slightly jiggle in the center; it will set as it cools.
Listen for Sound Cues
- Bread: Tap the bottom of the loaf; a hollow sound indicates doneness.
- Cheesecakes: Often, a gentle hum or a faint crackling sound suggests they’re ready.
Timing and Consistency
- Timer: Use a kitchen timer to keep track of baking times.
- Consistent Sizes: Ensure uniformity in size for even baking.
These methods collectively eliminate the uncertainty, ensuring perfectly baked goods every time.
Hack 18: Cooling and Storing Baked Goods
Proper cooling and storage of baked goods are crucial to maintain their freshness and quality. To achieve optimal results, bakers should adhere to the following guidelines for cooling different types of pastries and storing them effectively.
Cooling Tips
- Using a cooling rack:
- Place baked goods on a wire cooling rack immediately after removing them from the oven. This allows air to circulate around them, preventing sogginess caused by trapped steam.
- Avoiding condensation:
- For items such as pies or tarts, remove them from their baking pan before placing on the cooling rack. This helps prevent condensation from making the crust soggy.
- Cooling time:
- Allow most baked goods to cool for at least 30 minutes to an hour. Cakes may need more time to cool entirely before frosting or decorating.
Storing Tips
- Room temperature:
- Store cookies, bars, and quick breads in an airtight container at room temperature. Use parchment paper between layers to prevent sticking.
- Avoid refrigerating bread, as it can cause it to go stale faster.
- Refrigeration:
- Cream-filled pastries, cheesecakes, or items with perishable ingredients should be stored in the refrigerator. Ensure they are wrapped in plastic wrap or stored in containers with tight-fitting lids.
- Freezing methods:
- For longer storage, most baked goods can be frozen. Wrap items tightly in plastic wrap, then place in a freezer bag or airtight container to prevent freezer burn.
- To thaw, remove baked goods from the freezer and let them sit at room temperature or warm them gently in an oven set to a low temperature.
- Labeling:
- Always label containers with the date of baking and type of pastry. This helps keep track of freshness and reduces the risk of consuming items past their prime.
These practices ensure that baked goods retain their texture and flavor, providing long-lasting enjoyment.
Hack 19: Creative and Effective Decoration Tips
1. Utilize Piping Bags and Tips
Piping bags and tips can elevate the appearance of baked goods significantly. Different nozzle shapes create varied patterns:
- Star Tips: Perfect for rosettes, swirls, and shell borders.
- Round Tips: Best for writing, dots, and smooth edging.
- Leaf Tips: Used to create foliage and intricate details on floral designs.
2. Master the Art of Icing
Smooth and even icing can make a huge difference in the presentation of cakes and cookies. Employ the following methods:
- Crumb Coat: Apply a thin layer of icing to lock in crumbs before adding the final, thicker layer.
- Icing Smoother: Utilize to achieve a sleek, professional finish. Warm the tool in hot water to prevent icing from sticking.
3. Incorporate Edible Glitter and Luster Dust
Add a touch of sparkle with edible glitter and luster dust. They are available in various colors and can make cupcakes, cookies, and cakes gleam:
- Application: Brush on a thin layer or sprinkle lightly for a subtle shine.
- Mixing: Combine with clear alcohol or extract for a paint-like texture to draw or highlight details.
4. Leverage Stencils for Precision
Stencils help in creating consistent and intricate patterns with minimal effort:
- Powdered Sugar/Cocoa Dusting: Lay stencils over baked goods and sift powdered sugar or cocoa over them.
- Royal Icing / Airbrushing: Apply stencils, then use royal icing or an airbrush to fill in designs for a neat, professional look.
5. Experiment with Fresh Fruits and Herbs
Garnishing with fresh fruits and herbs adds a burst of color and an elegant touch:
- Arrangement: Create symmetrical designs with berries, mint leaves, or edible flowers.
- Layering: Use thinly sliced fruits for layering to add depth and dimension to the presentation.
6. Employ Chocolate Decorations
Chocolate can be molded, piped, or shaved into various shapes and forms:
- Chocolate Curls: Use a vegetable peeler to create delicate curls from a chocolate block.
- Chocolate Drips: Drizzle melted chocolate over cooled desserts for a sophisticated finish.
7. Texturing Tools and Techniques
Enhance the surface of your icing or fondant with texturing tools:
- Embossing Mats: Press onto fondant to create intricate patterns.
- Spatulas and Combs: Utilize to add stripes, swirls, or zigzag textures to icing.
8. Create Depth with Multiple Layers
Multiple layers create a visually appealing effect:
- Different Flavors and Colors: Vary layers using different flavors and colors to enhance the overall look and taste.
- Thinly Spread Layers: Thinly spread fillings and icings between layers for a neat, structured appearance.
9. Use Clear Gel for Shiny Finishes
Clear gel provides a glossy, attractive finish:
- Fruit Glaze: Brush over fruit toppings to keep them fresh-looking and add extra shine.
- Piping Gel: Use to add glossy details or as an adhesive for delicate decorations.
Employing these creative and effective decoration tips can significantly elevate the aesthetic appeal of baked goods, making them as delightful to look at as they are to taste.
Hack 20: How to Fix Baking Mistakes Like a Pro
Even the most experienced bakers encounter mistakes. Knowing how to troubleshoot these errors can save a lot of time and frustration. Here’s how to address some common baking mishaps:
Overmixed Batter
Overmixing can lead to dense, rubbery baked goods. To remedy this:
- Stop mixing once ingredients are just combined.
- Fold in dry ingredients gently.
- Utilize a whisk instead of an electric mixer for better control.
Sunken Cakes
A sunken cake middle can be caused by several factors:
- Check for accurate oven temperature using an oven thermometer.
- Avoid opening the oven door too frequently.
- Don’t overfill the pan; stick to 2/3 full.
Burnt Edges
Burnt edges can ruin an otherwise perfect bake:
- Adjust the oven rack to the center position.
- Use insulated baking sheets to disperse heat evenly.
- Cover edges with foil midway through baking.
Undercooked Center
An undercooked middle often stems from:
- Uneven oven heat; rotate the pan halfway through.
- Checking doneness with a toothpick—if it comes out clean, it’s done.
- Extending baking time by 5-minute increments.
Flat Cookies
Flat cookies can occur due to:
- Over-creamed butter and sugar; mix until just creamy.
- Warm dough; chill dough for at least 30 minutes before baking.
- Incorrect flour ratio; measure using the scoop and level method.
Dry Cakes
A dry cake can be saved by:
- Adding simple syrup to the layers.
- Baking at a lower temperature for longer periods.
- Using cake strips to keep edges from drying out.
Runny Frosting
To thicken frosting:
- Chill it for 15-20 minutes.
- Add more powdered sugar gradually.
- Incorporate cream cheese for added texture.
Soggy Pie Crust
Dealing with a soggy bottom requires:
- Blind-baking the crust before adding the filling.
- Brushing with egg white to create a barrier.
- Using a baking stone to ensure even heat distribution.
Lumpy Batter
Lumpy batter can be fixed by:
- Sifting dry ingredients beforehand.
- Gradually mixing in liquids to avoid clumps.
- Using a whisk to break up small lumps.
Grainy Buttercream
Smooth grainy buttercream by:
- Increasing whipping time until silky.
- Adding a splash of milk to incorporate air.
- Using superfine sugar instead of granulated.
Knowing how to rectify these common mistakes ensures a flawless baking experience.
Conclusion: Practice Makes Perfect
Mastering the art of baking requires dedication and consistent practice. Every baker, novice or experienced, will benefit from continual learning and experimentation in the kitchen. Here are several important points to remember:
- Repetition Builds Skill: The more a baker practices a particular technique, such as kneading dough or folding pastry, the more proficient they will become. Muscle memory plays a significant role in perfecting these skills.
- Learning from Mistakes: Errors are an integral part of the learning process. Each mistake provides a valuable lesson and an opportunity to improve. Keeping a baking journal to note errors and successes can be extremely helpful.
- Understanding Ingredients: Familiarity with how different ingredients function individually and interact with each other is essential. Experimenting with ingredient ratios will offer insights into recipe adjustments for optimal results.
- Patience and Persistence: Patience is crucial in baking. Allowing dough to rise, letting mixtures rest, or simply not rushing through steps can make a significant difference in the final product. Persistence in practicing these steps cannot be overstated.
- Seeking Feedback: Constructive criticism from trusted sources can provide invaluable insights. Asking friends, family, or fellow bakers to taste and comment on baked goods will help identify areas for improvement.
- Utilizing Resources: Bakers should leverage available resources such as tutorials, books, and baking communities. Online forums and social media groups can offer support, tips, and answers to specific questions.
- Setting Small Goals: Breaking down baking skills into manageable tasks can lead to consistent progress. Practicing piping, for example, over a series of days can help in mastering intricate designs.
- Embracing Technology: Utilizing modern tools such as kitchen scales, digital thermometers, and precise timers can significantly enhance consistency in baking. Understanding their proper use is beneficial.
“Every time you bake, you have the chance to get better at what you’re doing. The true secret to perfect pastries lies in persistent practice and the willingness to learn.”
In conclusion, while baking may initially present challenges, continuous practice and patience will pave the way for significant improvement. By embracing these principles, any baker can strive towards creating perfect pastries.


Thanks designed for sharing such a pleasant thought, post is pleasant,
thats why i have read it completely