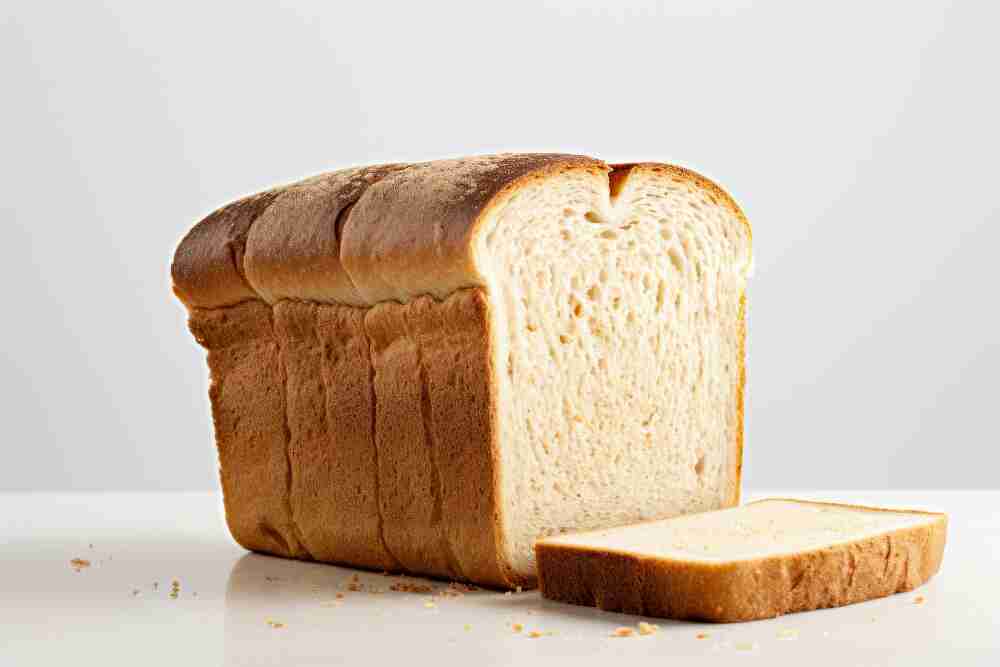
Craving that bakery-fresh aroma of homemade bread wafting through your kitchen? Look no further than this easy-to-master White Wheat Bread recipe! This fluffy, flavorful loaf strikes the perfect balance between nutritious whole wheat and the comforting taste of classic white bread.
Packed with simple ingredients and minimal hands-on time, this recipe empowers even novice bakers to achieve golden-brown loaves bursting with soft, pillowy goodness. Whether you’re crafting the foundation for a satisfying sandwich, indulging in toasted bliss with a butter and jam, or simply savoring the warmth of a freshly baked masterpiece, this versatile bread becomes a cherished staple in your culinary repertoire.
So, ditch the store-bought slices and embrace the joy of homemade breadmaking! This recipe guides you through every step, from activating the yeast to achieving a picture-perfect crust, ensuring success with every single bake. Get ready to impress your family and friends with your newfound baking prowess!
Now, let’s gather our ingredients and dive into the delightful world of White Wheat Bread!


White Wheat Bread FAQs: Answers to Your Baking Conundrums!
Conquering the world of homemade bread can be thrilling, but sometimes even the simplest recipes spark unexpected questions. Fear not, fellow bakers! This FAQ dives deep into the mysteries of White Wheat Bread, ensuring your loaves rise perfectly every time.
Q: What’s the difference between white wheat and whole wheat flour?
Think of white wheat flour as a refined version of its whole-wheat cousin. Both utilize the entire wheat kernel, but white wheat removes the bran and germ, resulting in a lighter color and texture. While still containing some nutrients, whole wheat retains all the bran and germ, making it denser and packed with more fiber. So, white wheat offers a compromise: the mild flavor and fluffiness of white bread with a touch more whole-grain goodness.
Q: My dough isn’t rising! Help!
Don’t fret! Several factors can hinder dough’s rise:
- Inactive yeast: Ensure your yeast is fresh and hasn’t expired. Double-check temperature of your water – lukewarm (105-115°F) is ideal for activating yeast.
- Insufficient kneading: Give your dough some love! Proper kneading develops gluten, which gives bread its structure and allows it to rise.
- Too much flour: A heavy hand with flour can make the dough dense and prevent rising. Add flour gradually until the dough is just barely tacky.
- Cold environment: Yeast thrives in a warm place (around 70-80°F). Find a cozy spot for your dough to rise, like near a warm oven or sunny window.
Q: Can I substitute ingredients?
Absolutely! This recipe is flexible:
- Honey: Swap with agave nectar, maple syrup, or even mashed banana for a natural sweetness twist.
- Olive oil: Canola, vegetable, or grapeseed oil work well as neutral substitutes. For richer flavor, experiment with melted butter.
- Milk: Unsweetened dairy or plant-based milks can replace water for added moisture and subtle flavor variations.
Q: How do I achieve a perfectly golden crust?
Brushing the tops of your loaves with a little milk or water before baking creates a beautiful golden brown crust. You can also sprinkle on some coarse sea salt for added texture and flavor.
Q: My bread is dry! What went wrong?
Dryness can be due to several factors:
- Over-baking: Keep an eye on your oven and remove the bread when it reaches an internal temperature of 190°F.
- Not enough moisture: Check your measurements and ensure you added the correct amount of liquid. Consider adding a tablespoon or two more next time if needed.
- Improper storage: Store your bread at room temperature for a couple of days or wrap it tightly and freeze for longer storage.
Q: Can I make this recipe in a bread machine?
Absolutely! Simply adjust the wet and dry ingredients to match your machine’s specific instructions and let your trusty appliance handle the kneading and rising. You’ll still have the satisfaction of enjoying homemade bread with minimal effort.
Bonus Tip: Don’t discard the extra dough from shaping your loaves! Get creative and make delicious rolls, pizza crusts, or even cinnamon buns.
With these tips and tricks in your arsenal, baking white wheat bread becomes a breeze. So, preheat your oven, gather your ingredients, and get ready to conquer the art of fluffy, flavorful loaves! And remember, practice makes perfect (and delicious bread!).

White Wheat Bread
Equipment
- Large mixing bowl
- Stand mixer with dough hook (optional)
- Measuring cups and spoons
- Rubber spatula
- Baking sheet
- Parchment paper
- Loaf pans (2, 8.5×4.5 inch)
- Bread knife
Ingredients
- 3 1/2 cups white whole wheat flour
- 2 1/4 teaspoons active dry yeast
- 2 tablespoons honey OR Sugar 1 ½ tablespoon
- 1 1/2 teaspoons salt
- 1 1/2 tablespoons olive oil OR Canola Oil, Vegetable Oil etc
- 1 1/2 cups lukewarm water 105-115°F
Instructions
- Combine dry ingredients: In the large mixing bowl, whisk together the white whole wheat flour, yeast, and salt.
- Activate yeast: Stir in the honey and olive oil, followed by the lukewarm water. Let the mixture sit for 5-10 minutes until the yeast is foamy and active.
- Knead dough: If using a stand mixer, attach the dough hook and knead the dough on medium speed for 5-7 minutes, or until smooth and elastic. If kneading by hand, turn the dough out onto a lightly floured surface and knead for 10-12 minutes, adding more flour as needed to prevent sticking.
- First rise: Place the dough in a greased bowl, cover it with the plastic wrap or a damp kitchen towel, and let rise in a warm place for 1-2 hours, or until doubled in size.
- Shape loaves: Punch down the dough and divide it in half. Gently shape each half into a loaf and place them in greased loaf pans. Cover loosely with plastic wrap or a damp towel and let rise for another 45-60 minutes, or until the dough reaches the rim of the pans.
- Preheat oven and bake: Preheat oven to 375°F (190°C). While the oven preheats, brush the tops of the loaves with a little water. Bake for 35-40 minutes, or until golden brown and a toothpick inserted in the center comes out clean.
- Cool and serve: Remove the bread from the oven and let it cool in the pans for 10 minutes before transferring to a wire rack to cool completely. Slice and enjoy!