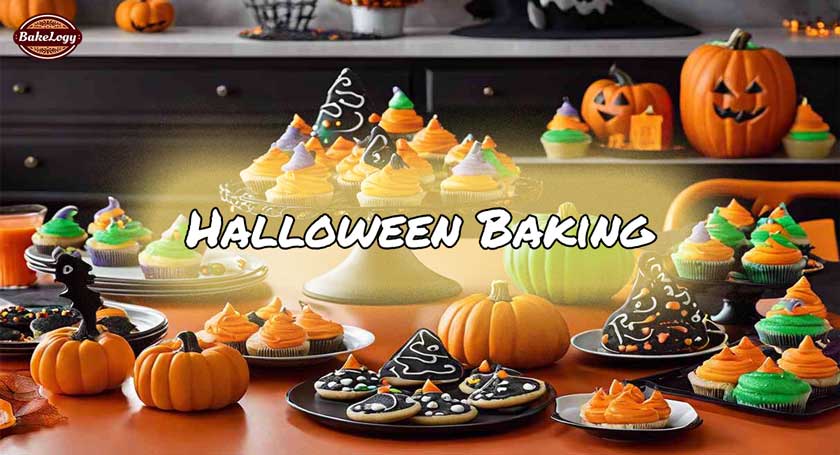
Discover ghoulishly good Halloween baking recipes perfect for a frightful feast. Impress your guests with spooky treats that are as delicious as they are eerie.
Introduction: Setting the Spooky Scene
With Halloween around the corner, it is the perfect time to transform the kitchen into a cauldron of frightful delights. Whether hosting a spine-chilling party or wishing to add a haunting twist to autumn treats, engaging in Halloween baking is sure to bring spooktacular fun to any household. The eerie atmosphere begins with the careful selection of ingredients and continues with the creativeness in presentation.
To create an authentically spooky experience, consider the following elements:
Atmosphere and Ambiance
- Decorations:
- Spiderwebs: Stretch cotton spiderwebs across windows, cabinets, and doorways.
- Candles: Utilize flickering LED candles for a ghostly glow.
- Pumpkins: Carve or paint pumpkins featuring ghoulish faces.
- Sounds:
- Music: Craft a playlist featuring eerie sound effects and Halloween-themed music.
- Nature Sounds: Include howling wind, creaking doors, and distant thunder for added effect.
- Lighting:
- Dim Lighting: Use dim, colored lights to cast eerie shadows.
- String Lights: Hang orange and purple string lights to give an otherworldly sheen.
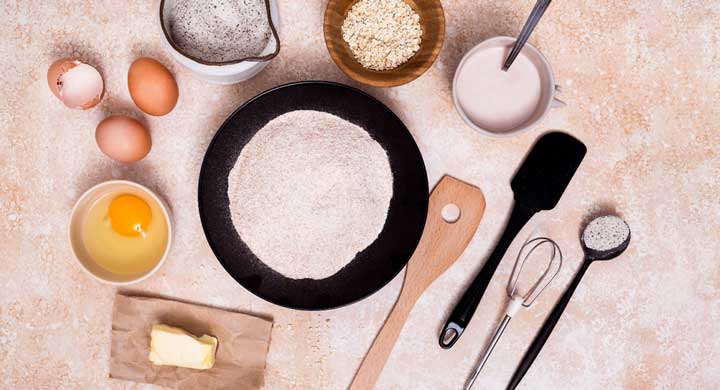
Essential Baking Tools
Having the right tools on hand ensures that the preparations for this ghostly feast proceed smoothly:
- Cookie Cutters: Shapes like pumpkins, bats, and ghosts for a thematic touch.
- Piping Bags: Essential for creating intricate designs with frosting.
- Silicone Molds: For making detailed chocolate or gelatin shapes.
- Edible Décor: Items such as candy eyes, black sprinkles, and edible glitter enhance the eerie aesthetics.
Ingredients
These ingredients set the tone for frightful yet delightful treats:
- Food Coloring: Utilize shades of orange, black, green, and purple.
- Spices: Autumnal spices like cinnamon, nutmeg, and clove evoke seasonal flavors.
- Chocolate: Dark chocolate adds a rich, indulgent flavor perfect for spooky treats.
By blending these elements, the kitchen will transform into an enchanting yet terrifying workshop. Through attention to detail and a dash of creativity, anyone can conjure a memorable baking experience fit for the Halloween season.
Essential Baking Tools for Your Halloween Feast
To craft a memorable Halloween feast, one must equip their kitchen with the right tools. Essential baking tools ensure smooth preparation, consistent results, and a professional finish for all spooky treats.
- Mixing Bowls: High-quality, non-slip mixing bowls of various sizes facilitate the blending and mixing of ingredients.
- Measuring Cups and Spoons: Accurate measurements are critical for perfecting recipes. Invest in durable, easy-to-read sets.
- Electric Mixer: Whether handheld or stand mixer, an electric mixer saves time and ensures thorough mixing.
- Spatulas and Whisks: Silicone spatulas resistant to high temperatures allow for smooth stirring and scraping. Whisks are indispensable for whipping and aerating ingredients.
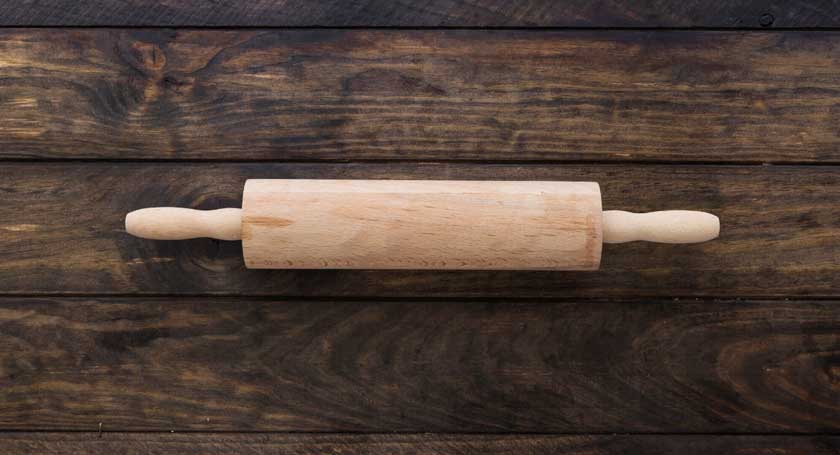
- Rolling Pin: A sturdy rolling pin is essential for rolling out doughs to even thicknesses, vital for cookies and pie crusts.
- Cookie Cutters: Halloween-themed cookie cutters, such as pumpkins, ghosts, and bats, add a festive touch to baked goods.
- Baking Sheets and Pans: Non-stick, heavy-duty baking sheets, and pans guarantee even heating and easy removal of treats like cookies, cupcakes, and brownies.
- Muffin Tins and Cake Molds: Muffin tins ensure perfect cupcakes while cake molds provide shapes and designs tailored to the Halloween theme.
- Cooling Racks: Stainless steel cooling racks facilitate air circulation around baked goods, ensuring they cool evenly without becoming soggy.
- Parchment Paper and Silicone Mats: These prevent sticking and make cleanup easier, offering non-stick surfaces for baking sheets.
- Decorating Tools: Piping bags, tips, and food coloring are crucial for intricate detailing and creative designs like spiderwebs and monster faces.
- Candy Thermometer: For those making candies or caramel, precise temperature control is key to achieving perfect consistency.
With these tools, bakers can bring their Halloween-themed creations to life with precision and flair. Each item in this list is selected to enhance the baking experience and ensure professional results.
Classic Recipes with a Sinister Twist
Pumpkin Spice Mummy Muffins
Pumpkin spice muffins receive an eerie transformation with cream cheese bandages wrapped around the top.
Ingredients:
- 1 ¾ cups flour
- 1 cup canned pumpkin
- ½ cup sugar
- 1 tsp baking soda
- 1 tsp cinnamon
- ½ tsp ground ginger
- ¼ tsp nutmeg
- Cream cheese frosting for the bandages
- Candy eyes
Instructions:
- Preheat the oven to 350°F (175°C).
- Mix flour, baking soda, cinnamon, ginger, and nutmeg.
- In a separate bowl, combine pumpkin and sugar.
- Blend wet and dry ingredients, then spoon into muffin tins.
- Bake for 20-25 minutes. Once cool, use a piping bag to add cream cheese frosting bands and place candy eyes on top.
Witches’ Bloody Red Velvet Cupcakes
These red velvet cupcakes are topped with a disturbingly delightful “blood” syrup.
Ingredients:
- 2 ½ cups flour
- 1 ½ cups sugar
- 1 cup buttermilk
- 1 tsp vanilla extract
- 1 ½ tsp baking soda
- 2 eggs
- 2 tbsp cocoa powder
- Red food coloring
- Syrup: ½ cup corn syrup, red food dye, edible glitter
Instructions:
- Preheat oven to 350°F (175°C) and line a cupcake tray.
- Mix flour, cocoa, and baking soda in one bowl.
- In another bowl, beat sugar and eggs. Add buttermilk and vanilla.
- Combine wet and dry mixtures. Add the food coloring to reach a vampiric red.
- Fill cupcake liners and bake for 20 minutes.
- For the syrup, mix corn syrup and food dye, then drizzle over cooled cupcakes.
Ghostly Macarons
Delicate macarons infused with a spine-chilling ghost motif.
Ingredients:
- 1 cup almond flour
- 1 ¾ cups powdered sugar
- 3 egg whites
- ¼ cup granulated sugar
- Edible black paint or food-grade black marker
Instructions:
- Preheat oven to 300°F (150°C).
- Process almond flour and powdered sugar together, then sift.
- Whip egg whites until soft peaks form. Slowly add granulated sugar until stiff peaks form.
- Gently fold in the almond mixture.
- Pipe circles onto a baking sheet. Bake for 15-17 minutes.
- Once cool, draw ghost faces using edible paint or a marker. Fill with favorite ganache.
These recipes are sure to haunt the taste buds and add a spine-chilling allure to any Halloween celebration.

Eerie Cakes and Cupcakes: Designs that Delight and Fright
Eerie cakes and cupcakes can elevate any Halloween celebration, combining culinary creativity with a spine-chilling twist. Here are a few designs and ideas that professionals and home bakers alike can use to impress guests with visually stunning and frightfully delightful treats.
- Graveyard Cakes
- Layers of rich chocolate cake serve as the “dirt.”
- Crushed chocolate cookies mimic real soil.
- Tombstone designs made from chocolate or fondant.
- Add gummy worms for an extra creepy effect.
- Webbed Cupcakes
- Frost cupcakes with dark chocolate or black icing.
- Create spider webs using white royal icing.
- Tiny spider accents made from fondant or candy.
- Blood-Drip Cakes
- Cover cakes with white fondant or buttercream.
- Use red-colored ganache or syrup to create dripping blood effects.
- Incorporate sugar glass shards for a shattered, eerie appearance.
“For an extra touch, consider adding edible glitter to the blood for a supernatural gleam.”
- Bone-Chilling Cupcakes
- Use vanilla or red velvet cupcakes as the base.
- Decorate with white skeleton bones made of fondant or icing.
- Arrange bones to appear as if they are emerging from cupcakes.
- Pumpkin Patch Delights
- Use carrot or pumpkin spice cake for a thematic base.
- Frost with orange-colored buttercream.
- Create tiny pumpkins using fondant, with pretzel sticks as stems.
- Witch’s Hat Toppers
- Chocolate cupcakes with rich, dark frosting.
- Add pre-made witch hat toppers using black fondant.
- Incorporate green or purple frosting for additional flair.
Tips for Professional Finish
- Piping Techniques: Use different piping tips for varied textures on cupcakes and cakes.
- Edible Decorations: Opt for edible glitter, pearls, and food coloring to enhance visuals.
- Visual Contrast: The interplay of dark and light colors enhances the eerie effect.
- Skillful Arrangement: Carefully arrange decorations for a polished look.
Ingredients to Consider
- Dark chocolate for rich, earthy tones.
- High-quality fondant for detailed designs.
- Gel-based food colors for vibrant tints.
- Candy elements like gummy worms for authenticity.
By incorporating unique elements and paying attention to detail, one can create both visually stunning and tastefully thrilling cakes and cupcakes that leave a lasting impression on any Halloween gathering.
Spooky Cookies that Cast a Delicious Spell
Transform your kitchen into a haunted bakery with these eerily enchanting cookie recipes. Each treat promises to bewitch taste buds and add a touch of dark magic to your Halloween spread.
Ingredients
- For the Cookie Dough:
- 2 ¾ cups all-purpose flour
- 1 teaspoon baking soda
- ½ teaspoon baking powder
- 1 cup unsalted butter, softened
- 1 ½ cups white sugar
- 1 egg
- 1 teaspoon vanilla extract
- Assorted gel food colors (orange, green, purple, black)
- For the Icing:
- 2 cups powdered sugar
- 1 teaspoon vanilla extract
- 2-3 tablespoons milk
- Gel food coloring (matching the cookie dough colors)
- Assorted sprinkles and edible decorations
Instructions
- Prepare the Dough:
- In a large bowl, whisk together the flour, baking soda, and baking powder. Set aside.
- In a separate bowl, cream together the butter and sugar until light and fluffy. Beat in the egg and vanilla extract.
- Gradually add the dry ingredients to the wet mixture, blending until smooth.
- Divide the dough into four portions. Tint each portion with a different color using gel food colors, kneading until evenly colored.
- Shape and Chill:
- Wrap each colored dough portion in plastic wrap and refrigerate for at least 1 hour.
- Preheat the oven to 350°F (175°C). Line baking sheets with parchment paper.
- Roll out each section of dough on a lightly floured surface to ¼-inch thickness. Use Halloween-themed cookie cutters (e.g., ghosts, bats, pumpkins) to cut out shapes. Place the shapes on the prepared baking sheets.
- Bake:
- Bake for 8-10 minutes or until the edges begin to turn lightly golden.
- Allow cookies to cool on the baking sheets for 5 minutes before transferring to wire racks to cool completely.
- Decorate:
- In a medium bowl, mix together the powdered sugar, vanilla, and milk to form a smooth icing. Divide the icing into several bowls and tint each with matching gel colors.
- Use piping bags or small zip-top bags with a corner snipped off to pipe icing onto the cookies. Decorate with sprinkles and edible decorations to enhance the spooky effect.
These spooky cookies will enchant both young and old, perfect for your ghoulish gatherings. Prepare to cast a spell of delight over your Halloween table with these meticulously crafted treats. Keep these steps in mind to ensure a flawless execution that brings a touch of the supernatural to your baking. Your guests will be spellbound by the magical flavor and eye-catching decoration.
Ghoulishly Good Pies and Tarts
Halloween pies and tarts offer both a visual and gastronomic treat. These spine-chilling desserts are designed to impress guests with their eerie aesthetic and delightful flavors. Below is a selection of pies and tarts guaranteed to add a touch of macabre elegance to any Halloween feast.
Spider Web Pumpkin Pie
A Halloween classic with a twist. This pumpkin pie features a silky texture and rich autumnal spices, enhanced with a striking spider web pattern created using chocolate ganache.
Ingredients:
- 1 pie crust (homemade or store-bought)
- 2 cups pumpkin puree
- 1 cup heavy cream
- ¾ cup brown sugar
- 2 large eggs
- 1 teaspoon ground cinnamon
- ½ teaspoon ground ginger
- ¼ teaspoon ground cloves
- ½ cup dark chocolate chips
Instructions:
- Preheat oven to 375°F (190°C).
- Whisk together pumpkin puree, cream, brown sugar, eggs, and spices.
- Pour into pie crust and bake for 50-60 minutes.
- Melt chocolate chips in a microwave-safe bowl.
- Draw a spiral on the pie using melted chocolate and create a web pattern with a toothpick.
Witches’ Brew Blueberry Tart
A tart as mysterious as a witches’ brew, filled with juicy blueberries and encased in a buttery crust. The top is adorned with a lattice resembling twisted vines.
Ingredients:
- 1 tart crust (homemade or store-bought)
- 4 cups fresh blueberries
- ½ cup granulated sugar
- 3 tablespoons cornstarch
- 1 tablespoon lemon juice
- 1 teaspoon vanilla extract
- 1 egg (for egg wash)
Instructions:
- Preheat the oven to 375°F (190°C).
- Mix blueberries, sugar, cornstarch, lemon juice, and vanilla in a bowl.
- Pour blueberry mixture into tart crust.
- Cut the remaining dough into strips for the lattice top and place them over the tart.
- Brush lattice with egg wash and bake for 40-45 minutes.
Blood-Red Berry Tarts
Show-stopping mini tarts filled with a tangy raspberry coulis, delivering a strikingly bloody appearance that’s bound to be the centerpiece of any Halloween dessert table.
Ingredients:
- 12 mini tart shells
- 2 cups fresh raspberries
- ½ cup granulated sugar
- 2 tablespoons cornstarch
- 1 tablespoon lemon juice
- ½ cup water
Instructions:
- Preheat oven to 375°F (190°C).
- Blend raspberries, sugar, corn starch, lemon juice, and water in a saucepan.
- Cook on medium heat until mixture thickens.
- Fill tart shells with the raspberry mixture.
- Bake tarts for 15-20 minutes.
These pies and tarts bring an element of spookiness to Halloween celebrations, combining classic flavors with inventive, eerie presentations.
Phantasmal Pastries: Croissants, Danishes, and More
When venturing into the realm of Halloween baking, phantasmal pastries create a blend of eerie elegance and delectable flavor. Each pastry offers a unique canvas for creative twists and ghostly finishes. These recipes transform classic bakery staples into hauntingly delightful treats, perfect for any spooky celebration.
Croissants with a Twist
- Black Chocolate Croissants: Utilize activated charcoal dough to create a dark, mysterious base. Fill the layers with rich dark chocolate, and finish with a dusting of powdered sugar bone dust.
- Pumpkin Spice Croissants: Incorporate pumpkin puree into the dough and add a spicy cinnamon-sugar filling. Drizzle with a glaze made from pumpkin seed butter for an extra ghastly touch.
Fearsome Danishes
- Bloody Berry Danishes: Fill flaky Danish pastry with a mix of raspberries, strawberries, and pomegranate seeds. The vibrant red filling offers a blood-like appearance, especially when topped with a drizzle of ruby-red raspberry syrup.
- Creepy Cheese Danishes: Infuse the cream cheese filling with black food coloring and top with blueberry compote eyeballs. Create a spiderweb effect on the glaze using white icing.
Spooky Specialty Pastries
- Ghoul-Éclairs: These éclairs are filled with green pistachio cream and glazed with black and orange fondant. Pipe ghost faces using white icing for a fun, ghoulish finish.
- Monster Claws: Formed from almond pastry dough, mold these into claw shapes and decorate with toasted almond slivers for nails. Dip the tips in blood-red raspberry jam for a frightful flair.
Creating these phantasmal pastries involves a mix of creativity and precision. Bakers should focus on utilizing natural ingredients like activated charcoal, pumpkin puree, and berries to enhance the visual and flavor profiles. Each carefully crafted pastry contributes to an eerie, memorable feast that promises both scare and satisfaction.
Trick-or-Treat Breads and Savory Snacks
With Halloween fast approaching, indulging in themed breads and savory snacks can make any gathering spooktacularly delightful. Here are some top recipes and ideas to ensure all guests leave with a full stomach and a big smile.
Cheesy Ghost Breadsticks
These ghost-shaped breadsticks are both fun to make and delicious. They can serve as a perfect side dish or a spooky appetizer for any Halloween festivity.
Ingredients:
- Refrigerated pizza dough
- Shredded mozzarella cheese
- Butter
- Garlic powder
- Black olives (for eyes)
Instructions:
- Preheat oven to 375°F (190°C).
- Roll out pizza dough on a floured surface.
- Cut dough into ghost shapes using a cookie cutter.
- Sprinkle shredded mozzarella cheese.
- Bake for 12-15 minutes, until golden brown.
- Melt butter and mix with garlic powder. Brush over baked breadsticks.
- Place tiny pieces of black olives as eyes.
Spidery Savory Pies
Small hand pies filled with a rich, savory filling and decorated with olive spiders make for a creepy yet delicious treat.
Ingredients:
- Puff pastry sheets
- Ground beef or preferred filling
- Onion, diced
- Olive slices (to form spider legs and bodies)
Instructions:
- Preheat oven to 400°F (200°C).
- Cook ground beef with diced onions.
- Roll out puff pastry and cut into circles.
- Place a spoonful of the filling on one circle and cover with another. Seal edges.
- Use olive slices to create spider decorations on top.
- Bake for 20-25 minutes until golden brown.
Monster Fingers Bread
These breadsticks are made to look like creepy monster fingers and make an excellent addition to a Halloween snack platter.
Ingredients:
- Bread dough or pre-made breadsticks
- Almond slices (for fingernails)
- Egg wash
Instructions:
- Preheat oven to 350°F (175°C).
- Shape bread dough into finger-like forms.
- Press an almond slice at the tip to resemble a fingernail.
- Brush with egg wash for a shiny finish.
- Bake for 10-12 minutes until golden brown.
Mummy Hot Dogs
A fun twist on the classic hot dog, wrapped in dough to look like mummies.
Ingredients:
- Hot dogs
- Crescent roll dough
- Mustard (for eyes)
Instructions:
- Preheat oven to 375°F (190°C).
- Wrap crescent dough strips around each hot dog.
- Leave a small space for the face.
- Bake for 15-20 minutes until golden brown.
- Use mustard to dot on eyes.
Incorporating these savory Halloween-themed treats ensures a balanced array of festive food to complement the sugary sweets, giving guests of all ages something to relish.
Utilizing Halloween-Themed Ingredients
Incorporating Halloween-themed ingredients can elevate the spook factor of baked goods, transforming ordinary recipes into frightful delights. Several ingredients naturally lend themselves to the holiday’s eerie theme and can be effectively used to conjure a sense of macabre fun.
Dark Chocolates and Black Cocoa
Dark chocolates and black cocoa powder are optimal for creating sinister-looking treats. The rich, deep color they provide is perfect for cakes, cookies, and cupcakes themed around the dark arts.
- Dark Chocolate: An ideal choice for intense flavor and color.
- Black Cocoa Powder: Provides an even darker hue compared to standard cocoa.
Spooky Shape Enhancers
Shape enhancers like cookie cutters and molds come in handy for producing thematic shapes.
- Pumpkin Cutters: For delightful pumpkin-shaped cookies.
- Bat Molds: Ideal for cakes and gelatin desserts.
Natural and Edible Colorings
Natural colorings can add vibrant, eerie colors without the artificial taste. Consider products like:
- Activated Charcoal: For deep black hues, best used in moderation.
- Beet Powder: Adds a natural reddish tint, perfect for “bloody” effects.
- Turmeric: Provides a bright yellow, suitable for monster-themed goodies.
Candies and Toppings
Candies and various toppings can serve as decorative elements or mix-ins.
- Candy Corn: Classic and colorful.
- Edible Eyes: Adds a spooky touch to cookies and cupcakes.
- Licorice Strings: Useful for creating spider legs or other creepy appendages.
Spices
Traditional spices can evoke the essence of the fall season and add complexity to Halloween treats.
- Cinnamon: Offers warmth and pairs well with pumpkin.
- Nutmeg: Adds a subtle, nutty flavor.
- Cloves: Enhances depth in pumpkin pies and spiced cakes.
Unconventional Ingredients
To make completely original treats, consider unconventional ingredients that surprise and delight.
- Dry Ice: For a foggy, haunted effect in drinks and table settings.
- Edible Glitter: Adds a magical and mysterious shimmer.
By leveraging these Halloween-themed ingredients, bakers can create desserts that are not only visually compelling but also rich in seasonal flavors and textures, ensuring their Halloween feast is both frightful and delightful.
Healthy Alternatives for the Conscious Spook
Halloween doesn’t always have to be sugar-laden. With consciousness about health growing, there are plenty of nutritious alternatives that still bring delight!
1. Spooky Sweet Potato Bites
Opt for baked sweet potato rounds instead of traditional sugary cookies. Slice sweet potatoes into half-inch rounds, drizzle with olive oil, and bake until golden. Once cooled, use Greek yogurt mixed with a bit of dark cocoa powder to create spooky faces.
2. Apple Monster Mouths
Replace candy with crispy, fresh apples. Slice apples into quarters, removing seeds but keeping the peel. Spread almond butter inside each quarter, then press almond slivers along the edge to mimic teeth. Add a strawberry tongue for a gory touch!
3. Ghastly Grape Snacks
Create an eerie treat with grapes. Dip grapes partially into Greek yogurt, then freeze. The yogurt becomes a ghostly shroud while dark grapes underneath create spooky bulges, perfect for little goblins craving a cool snack.
4. Chewy Cinnamon Bats
Instead of sugar-laden treats, use dates and nuts. Blend pitted dates with walnuts, cinnamon, and a touch of vanilla extract. Shape the mixture into bat forms and roll in a sprinkle of coconut flakes for a boo-tiful finish.
5. Creepy Carrot Fingers
Swap candy bars for veggie trays designed to encourage healthy munching. Carrots can be shaped into finger-like pieces with a small slice of almond representing the fingernail. Arrange these on hummus or guacamole for added spookiness.
Pro Tip: Using natural ingredients not only boosts nutrition but also enhances flavors, making these snacks enjoyable for everyone.
6. Eerie Eyeball Eggs
Deviled eggs are a great protein-packed option. Hard-boil eggs, cut them in half, and mix yolks with mashed avocado for a ghoulish green filling. Place an olive slice in the center to create an eyeball look.
7. Witches’ Brew Smoothie
A vibrant smoothie can be an excellent alternative to sugary punch. Blend spinach, mango, and banana with almond milk for a green potion. Add chia seeds for an extra boost of fiber and serve in goblets for a magical touch.
These healthy Halloween alternatives ensure that the festivities are as nutritious as they are spirited.
Tips for Presentation: Making Your Bakes Truly Terrifying
Creating an eerie atmosphere with your Halloween bakes is as much about appearance as it is about taste. Here are several expert tips to help make your creations shockingly stunning:
- Color Schemes: Incorporate classic Halloween colors such as black, orange, purple, and green. Use food coloring to achieve vibrant hues. Consider black icing for spiders or ghosts and neon green for slime effects.
- Edible Decorations:
- Candy Eyes: Place them strategically to give your treats a living, breathing appearance.
- Gummy Worms: Perfect for crawling out of cupcakes or being half-buried in pies.
- Sugar Glass: Create shards for a broken glass effect; it’s both eerie and edible.
- Shaping Tools: Invest in cookie cutters and molds shaped like bats, pumpkins, ghosts, and skeletons. These tools make it easier to achieve precise, recognizable shapes.
- Textures:
- Spider Webs: Use royal icing or melted white chocolate to pipe delicate webs.
- Dripping Blood: Create a convincing blood effect with red gel icing, allowed to drip naturally over edges for a gruesome appearance.
- Lighting: Present your bakes under dim lighting. Use spooky lanterns or LED candles to cast ominous shadows, enhancing the eerie ambiance.
- Serving Dishes:
- Themed Platters: Choose serving platters with Halloween motifs.
- Cauldrons and Coffins: Place cupcakes or candy in tiny cauldrons or coffin-shaped boxes.
- Props and Backgrounds:
- Use mini tombstones, skulls, and spiders around your display.
- Opt for dark, textured cloth like burlap or linen for a chilling table setup.
- Glitter and Sprinkles: Edible glitter or sprinkles in dark or neon colors can add the perfect finishing touch to cupcakes and cookies. Use lightly to avoid overwhelming the design.
- Interactive Elements: Introduce a touch of surprise. For instance, include fillings that ooze when bitten into, such as red velvet cake with strawberry jam or custard.
Incorporating these elements into your Halloween bakes can elevate their appearance, making them the centerpiece of any festive gathering. Attention to detail is crucial in achieving a truly terrifying effect.
Conclusion: Wrapping Up Your Frightful Feast
With an array of ghoulishly good Halloween baking recipes at your disposal, hosting a frightful feast becomes an exciting endeavor. Each recipe, brimming with creativity and eerie charm, transforms your kitchen into a spooktacular bakery. When planning your feast, consider the following key points to ensure the event is both memorable and delicious:
Key Elements of a Successful Frightful Feast
- Variety and Balance
- Incorporate a range of treats, from sweet to savory.
- Include options for different dietary preferences, such as gluten-free or vegan items.
- Ensure a balance of textures, flavors, and colors to keep the display visually appealing.
- Presentation
- Use themed serving dishes and utensils to enhance the spooky atmosphere.
- Arrange treats creatively to mimic eerie scenes, such as graveyards or haunted houses.
- Opt for an organized layout that allows easy access to all items.
- Interactive Elements
- Introduce interactive food stations where guests can customize their treats.
- Set up a decorating station with various toppings and icings.
- Create DIY kits for guests to take home and craft their own creepy creations.
- Ambiance
- Combine your baked goods with thematic decorations like cobwebs, pumpkins, and eerie lighting.
- Incorporate background music or sound effects to amplify the spooky vibe.
- Utilize textures such as dry ice or fog machines for added mystery.
- Safety and Cleanliness
- Adhere to food safety guidelines to prevent any health risks.
- Clearly label all ingredients to avoid potential allergens.
- Maintain a clean and organized kitchen and display area.
By combining these elements, any Halloween gathering can be elevated from a simple party to a true frightful feast. The attention to detail in both preparation and presentation ensures that every guest leaves with a sense of delight and a touch of eerie enchantment.
Bringing the spirit of Halloween into the kitchen cultivates a whimsical atmosphere that makes the event memorable for all attendees. The combination of creative recipes, thoughtful presentation, and interactive fun guarantees an unforgettable experience.